Difference between revisions of "DLink Router Configuration"
Jump to navigation
Jump to search
(clarify) |
m (wording) |
||
| Line 6: | Line 6: | ||
#When you have logged in (the example router has a user ID of "admin" and no password), then under "Setup" at the top, and "Internet" at the left, select "Manual Internet Connection Setup." | #When you have logged in (the example router has a user ID of "admin" and no password), then under "Setup" at the top, and "Internet" at the left, select "Manual Internet Connection Setup." | ||
#On the screen | #On the next screen look for the "Internet Connection Type" area of the window, and choose the "My Internet Connection is:" pull-down menu to select "PPPoE(Username/Password)" | ||
#Once you've selected that you will see the "PPPOE INTERNET CONNECTION TYPE:" box is added lower down on that page, and you can select The following settings: | #Once you've selected that you will see the "PPPOE INTERNET CONNECTION TYPE:" box is added lower down on that page, and you can select The following settings: | ||
##Address Mode: "Dynamic IP" | ##Address Mode: "Dynamic IP" | ||
Revision as of 16:31, 13 December 2015
This page outlines how to set up a DLink router to work with a DSL modem in bridge mode.
How to configure a DLink Router
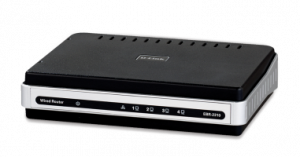
Look at the bottom of the DLink router to see if there is information about the configuration page address. The model used for this help page is a DLink EBR-2310, but many others have a similar interface.
- When you have logged in (the example router has a user ID of "admin" and no password), then under "Setup" at the top, and "Internet" at the left, select "Manual Internet Connection Setup."
- On the next screen look for the "Internet Connection Type" area of the window, and choose the "My Internet Connection is:" pull-down menu to select "PPPoE(Username/Password)"
- Once you've selected that you will see the "PPPOE INTERNET CONNECTION TYPE:" box is added lower down on that page, and you can select The following settings:
- Address Mode: "Dynamic IP"
- User Name: Use your NCF id here, in the form of your email address - like ab123@ncf.ca
- Password and Verify Password - use your DSL password - which is 12 characters long
- The rest of the settings can be left as is.
- When you've entered those items, select the "Save Settings" button up near the top of the screen.

