Difference between revisions of "WiFi Changes for Hitron Modems"
(Added pictures) |
|||
| Line 5: | Line 5: | ||
2. Open an Internet browser on your computer and connect to the modem by typing [http://192.168.0.1 192.168.0.1] in the address bar. | 2. Open an Internet browser on your computer and connect to the modem by typing [http://192.168.0.1 192.168.0.1] in the address bar. | ||
3. Enter the username and password for the login page. | 3. Enter the username and password for the login page. | ||
* Username: '''cusadmin''' | * Username: '''cusadmin''' | ||
* Password: WiFi password used during initial setup | * Password: WiFi password used during initial setup | ||
[[File:Hitron WiFi name change.png|alt=Hitron Login Screen|thumb]] | |||
4. On the top menu bar, select 'Wireless' | 4. On the top menu bar, select 'Wireless' | ||
Revision as of 15:54, 18 October 2021
Changing WiFi Name
1 a. Using an Ethernet cable plug into one of the yellow LAN Ports at the back of the Hitron modem.
1 b. Connect to the Wireless Network you set up initially for your Hitron Modem.
2. Open an Internet browser on your computer and connect to the modem by typing 192.168.0.1 in the address bar.
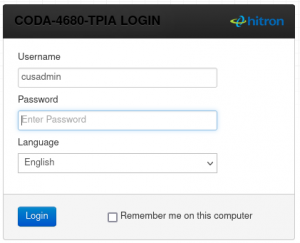
3. Enter the username and password for the login page.
- Username: cusadmin
- Password: WiFi password used during initial setup
4. On the top menu bar, select 'Wireless'
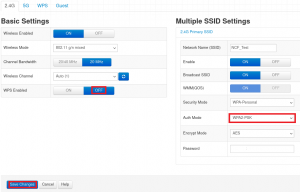
5. On the 2.4 Ghz tab, ensure WPS is OFF and the Auth mode is WPA2-PSK. Save your settings
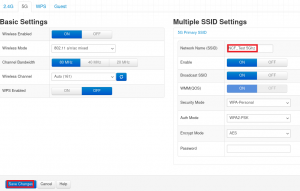
6. On the 5Ghz tab, change the Network Name (SSID) to be different from the 2.4Ghz name. We recommend adding ' 5Ghz' to the end. Save your settings.
You will then need to add the 5Ghz band to your devices, and if you wish to use it exclusively, you will need to remove or 'Forget' the 2.4Ghz band.


