Difference between revisions of "Windows Mail"
(Created page with 'This article details how to set up an NCF mail account on Windows Mail 10. ==Email Accounts== To set up an NCF account in the native email reader on the BlackBerry PlayBook tab…') |
m |
||
| (7 intermediate revisions by 3 users not shown) | |||
| Line 3: | Line 3: | ||
==Email Accounts== | ==Email Accounts== | ||
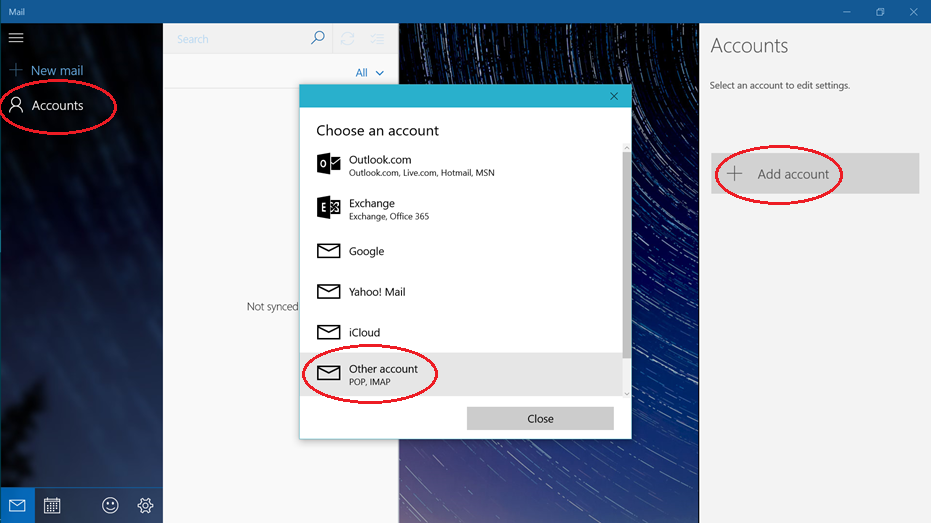
To set up an NCF account in the native email | To set up an NCF account in the native [[email]] client on Windows 10 you will first have to pull up the application from the start menu. Once you are inside the Mail application, go to '''Accounts''' > '''Add Account''' > '''Other Account: POP, IMAP''' as illustrated in the image below. | ||
[[File: | [[File:windows10mail_1.png]] | ||
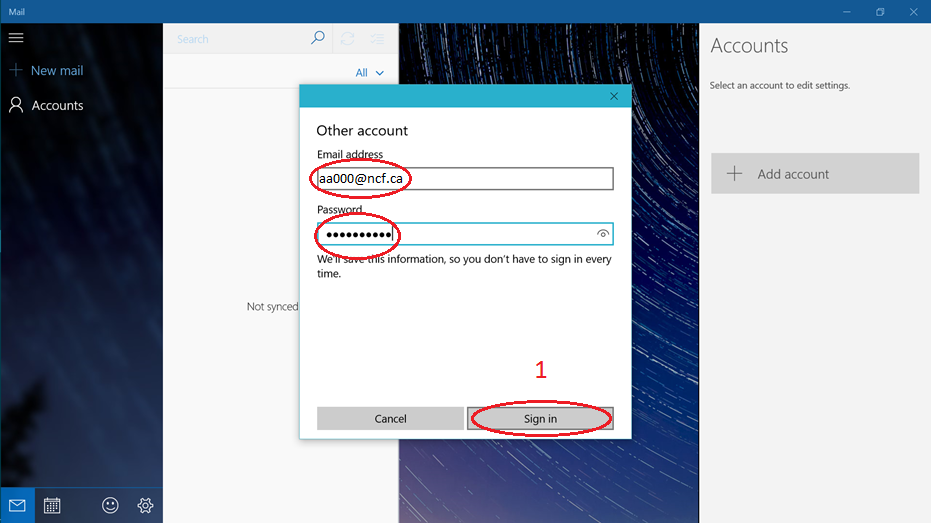
Enter your ncf email (format: aa000@ncf.ca) and your NCF password (same as you use when logging into our start page . Click '''Sign in''' (Click Number 1) | |||
[[File: | [[File:windows10mail_2.png]] | ||
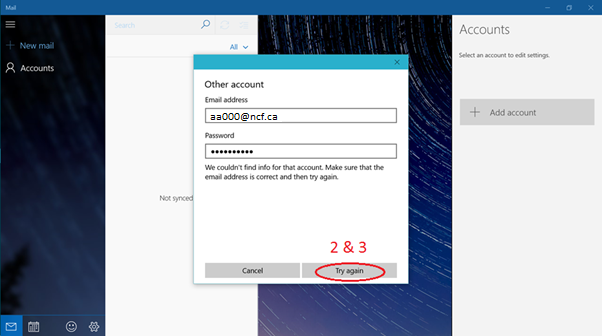
The '''Sign in''' button will then change into a '''Try again''' button. Click it two more times (No 2 & 3) | |||
[[File: | [[File:windows10mail_3.png]] | ||
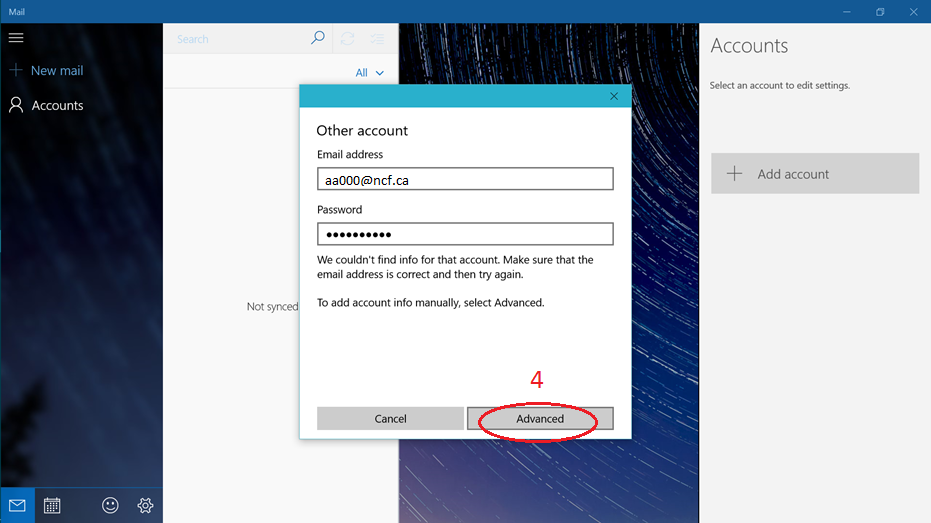
The '''Try again''' button will then change into the '''Advanced''' button. Click it one more time (4th overall click) | |||
[[File:windows10mail_4.png]] | |||
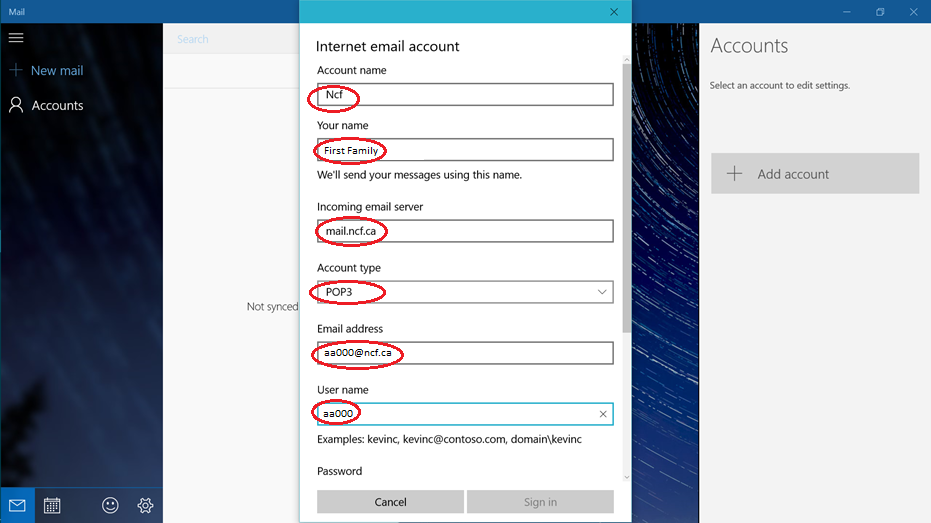
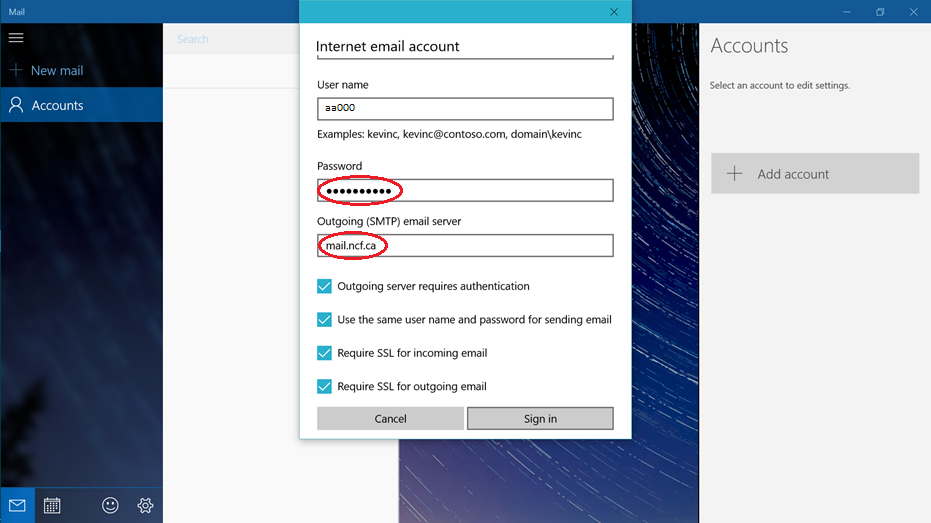
Enter the ncf recommended settings for a POP/IMAP account setup (Screenshots show POP3 setup. However IMAP4 can be set up the same way and recommended). | |||
[[File: | [[File:windows10mail_5_1.png]] | ||
[[File: | [[File:windows10mail_5_2.png]] | ||
[[Category:Email]] | [[Category:Email]] | ||
[[Category: | [[Category:Windows]] | ||
[[Category:Computer Help]] | |||
Latest revision as of 13:46, 29 October 2018
This article details how to set up an NCF mail account on Windows Mail 10.
Email Accounts
To set up an NCF account in the native email client on Windows 10 you will first have to pull up the application from the start menu. Once you are inside the Mail application, go to Accounts > Add Account > Other Account: POP, IMAP as illustrated in the image below.
Enter your ncf email (format: aa000@ncf.ca) and your NCF password (same as you use when logging into our start page . Click Sign in (Click Number 1)
The Sign in button will then change into a Try again button. Click it two more times (No 2 & 3)
The Try again button will then change into the Advanced button. Click it one more time (4th overall click)
Enter the ncf recommended settings for a POP/IMAP account setup (Screenshots show POP3 setup. However IMAP4 can be set up the same way and recommended).

