Difference between revisions of "WiFi Analyzer for Linux"
m |
(sp) |
||
| (3 intermediate revisions by 2 users not shown) | |||
| Line 5: | Line 5: | ||
Note: Instructions created using Ubuntu 18.04.1 (this will not work on Windows or Mac) | Note: Instructions created using Ubuntu 18.04.1 (this will not work on Windows or Mac) | ||
LinSSID is free software, released under the Qt Public License (QPL), Boost Software License (BSL1.0) and the GNU General Public License version 3.0 (GPLv3). | |||
== Download and Install LinSSID == | == Download and Install LinSSID == | ||
| Line 39: | Line 41: | ||
7. Leave the program to run for about 15 minutes and take a screenshot of the report. This will save the screenshot as an image in your “Pictures” file folder. Include the image in a reply to the most recent ticket email you received from [mailto:support@ncf.ca support@ncf.ca] as an attachment. | 7. Leave the program to run for about 15 minutes and take a screenshot of the report. This will save the screenshot as an image in your “Pictures” file folder. Include the image in a reply to the most recent ticket email you received from [mailto:support@ncf.ca support@ncf.ca] as an attachment. | ||
{{Template:WiFi_Analyzer_See_Also}} | |||
Latest revision as of 10:13, 25 March 2020
WiFi Analyzers: Windows | Windows 10 | Android | iOS | MacOS | Linux
How to Install and Check for WiFi Interference at Your Premises and Produce a Report for NCF
Note: Instructions created using Ubuntu 18.04.1 (this will not work on Windows or Mac)
LinSSID is free software, released under the Qt Public License (QPL), Boost Software License (BSL1.0) and the GNU General Public License version 3.0 (GPLv3).
Download and Install LinSSID
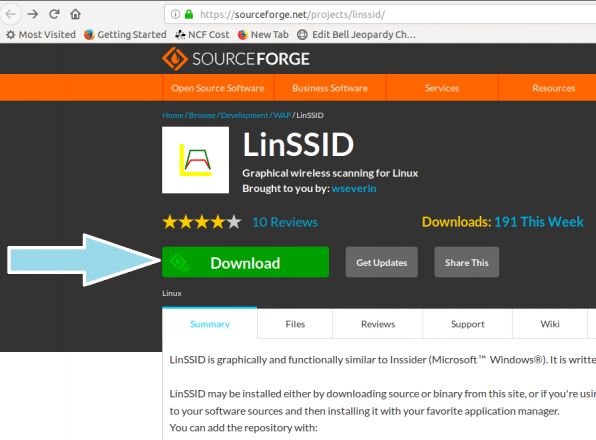
1. Navigate to this link to download and install “LinSSID
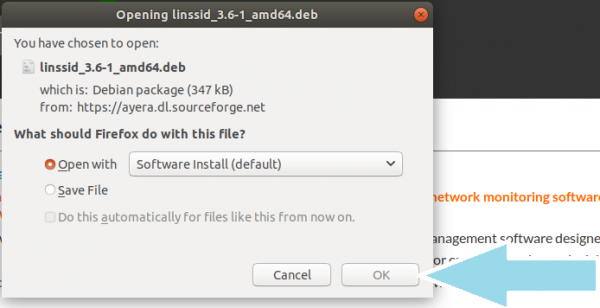
2. Click download - When prompted by your browser either:
- Firefox “Open with” Software Install (default) or
- Chromium/Chrome Allow file to download and then double click to open
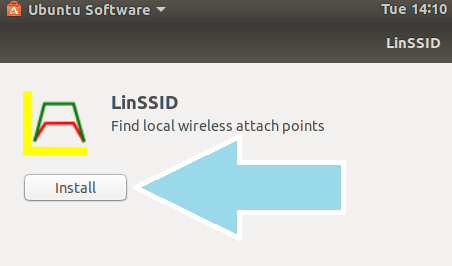
3. Ubuntu Software will open with option to install LinSSID.
4. Click install. You will be prompted to authenticate with your administrator password. Install will proceed if password is correct.
5. When completed, click “launch” in Ubuntu Software, or locate “LinSSID” under the “Show Applications” link (resembles nine spheres) in your Taskbar.
6. LinSSID will have you authenticate again using your password when launching the program.
Setting Up and Scanning Networks
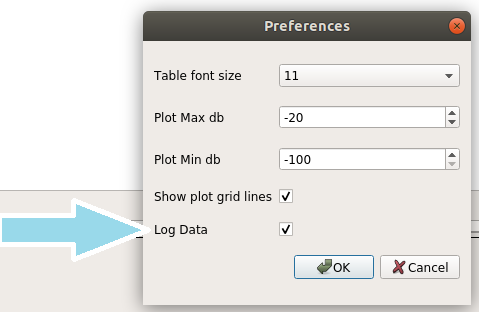
1. Access the “File” menu and select “Preferences” add a checkmark next to “Log Data”. Click OK.
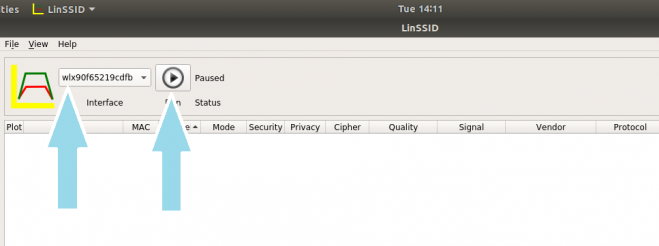
2. Select the wireless interface of your choice from the drop down list (most computers have only one).
3. Click the “Play” button (resembes a VCR) to start the test.
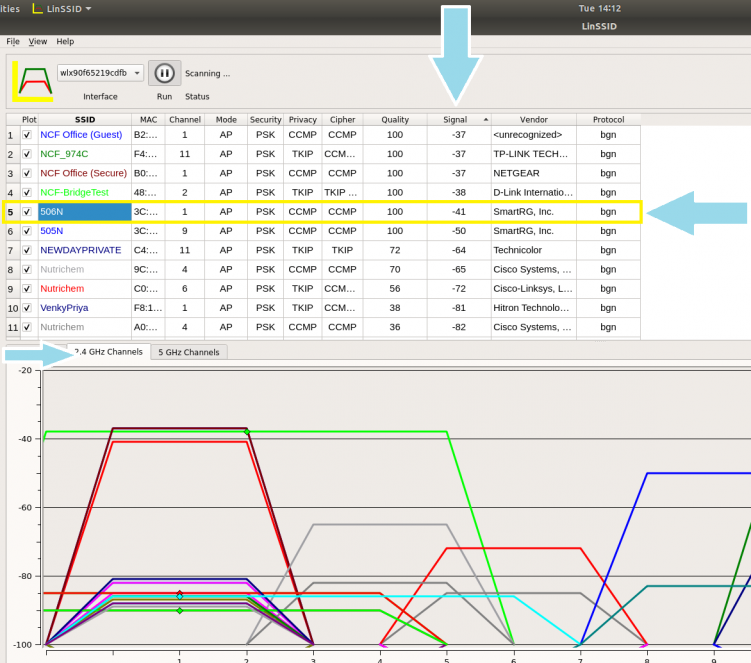
4. Sort the networks by “Signal” - lower numbers first (like golf, a lower number is better!
5. Ensure the “2.4 Ghz Channels” graph is showing! The channels with the most wifi networks represent the frequency bands with the most interference from other networks.
6. Click your network’s name to highlight it.
7. Leave the program to run for about 15 minutes and take a screenshot of the report. This will save the screenshot as an image in your “Pictures” file folder. Include the image in a reply to the most recent ticket email you received from support@ncf.ca as an attachment.

