Difference between revisions of "Microsoft Outlook 2010"
Jump to navigation
Jump to search
(explain) |
|||
| Line 41: | Line 41: | ||
==See also== | ==See also== | ||
*[http://web.ncf.ca/aw958/mail_help_files/outlook_2003_setup/outlook_2003.html Instructions on setting up Microsoft Outlook 2003 for NCF Email] | *[http://web.ncf.ca/aw958/mail_help_files/outlook_2003_setup/outlook_2003.html Instructions on setting up Microsoft Outlook 2003 for NCF Email] | ||
* [[Microsoft Outlook 2016|Instructions on setting up Microsoft Outlook 2016 for NCF Email]] | |||
[[Category:Email]] | [[Category:Email]] | ||
[[Category:Windows]] | [[Category:Windows]] | ||
Revision as of 11:39, 31 January 2017
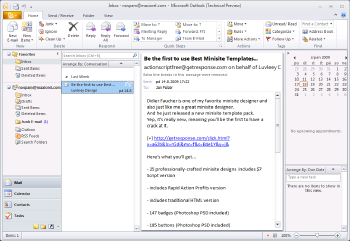
These instructions will lead you through setting up Microsoft Outlook 2010 for NCF Email.
Instructions
- Open Outlook
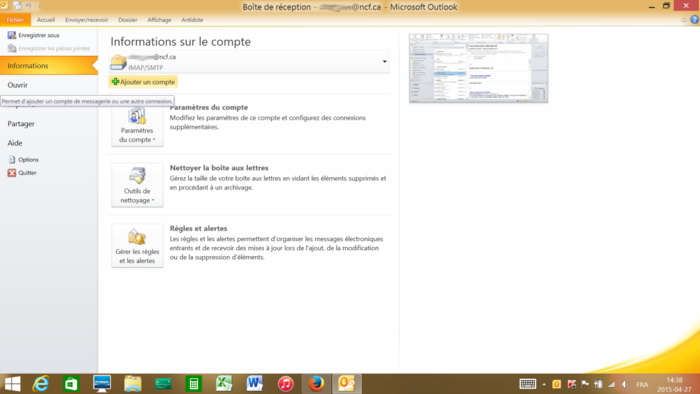
- Select File → Add account
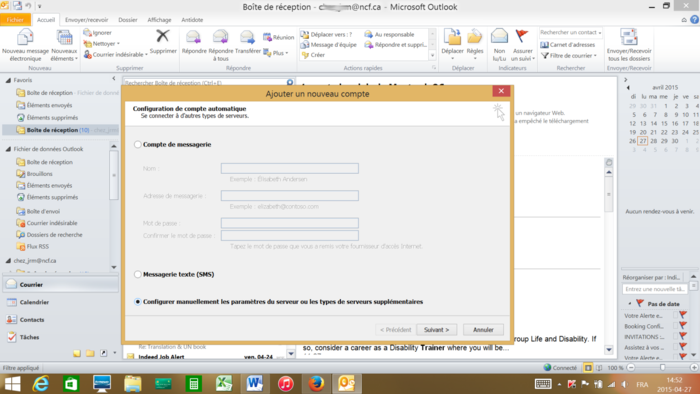
- Manually configure
- Next
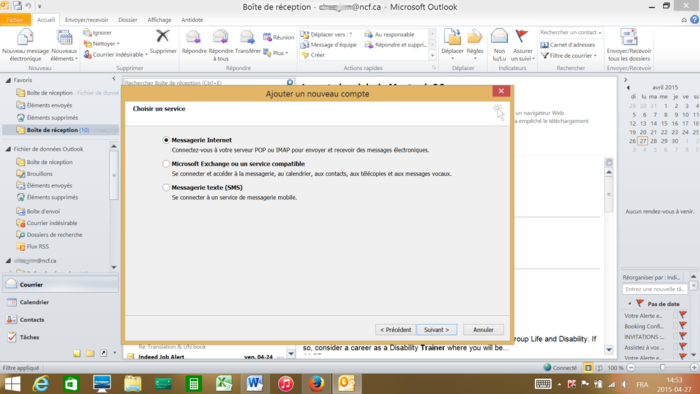
- Internet E-mail
- Next
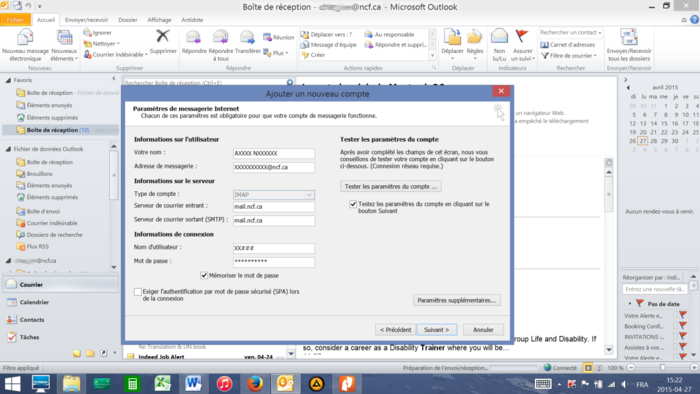
- Name (Your actual name)
- Email address (Your original NCF email address or your NCF email alias)
- Account type: Imap
- Incoming mail server: mail.ncf.ca
- Outgoing mail server: mail.ncf.ca
- User name: (eg: ab123)
- Password: (your NCF account password)
- Check "remember password".
- Don't check "authentication SPA"
- Click on "more settings" button on the right
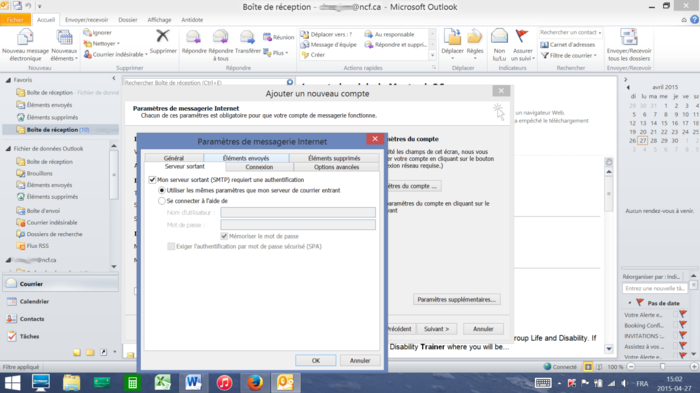
- Click on the "outgoing server" tab.
- Check "My outgoing server requires authentication".
- Select the button, Use the same settings as my incoming account server.
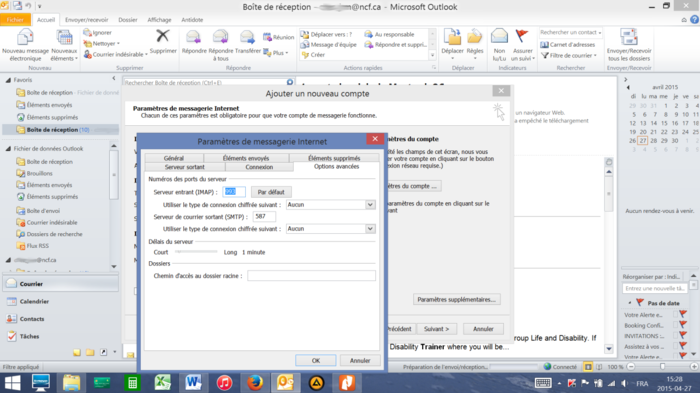
- Go to the, "Advanced"
- For incoming server use: 993, SSL
- For outgoing Server use: 587, encryption None
- Click on "OK"
Screenshots
Note: the provided screenshots are in the French language, but the location of all the configuration buttons and boxes are identical to the English version.
Special thanks to NCF member Jean Makrai for submitting these instructions and screenshots.

