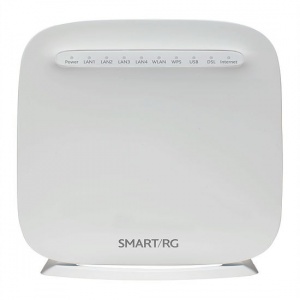
SmartRG SR505N Configuration
This is the procedure NCF uses to configure a SmartRG SR505N modem out of the box or after a factory reset. To learn more about configuring your particular modem, consult the manual.
Configure as router for VDSL
This section is for configuring your router for VDSL connections. These include the following NCF DSL Plans:
- Freedom 15-10/300
- Freedom 25/300
- Freedom 50/300
Getting Started
1. Once you access the modem browser at 191.168.1.1 and login ( admin/admin), click the link high-lighted in red.
1B. If the modem is brand new, "admin/admin" will be correct. If it's not new, it's recommended to reset the modem to factory defaults by holding down the reset button with a paper clip for 6 to 9 seconds. Getting started
Advanced Setup
2. Click on the "Advanced Setup" link on the LH side of the page. Advanced Setup
WAN Service
3. Click on the "WAN Service" link under "Advanced Setup" and then click on the "Edit" link highlighted in red. WAN Service
Username Setup
4. On the 'PPP Username and Password' page, fill the username and password details in the field highlighted in red. Scroll to the bottom of this page - check that "Firewall" and "NAT" are enabled PPPOE set up
PPPoE config save
5. There will be two more pages to scroll through and them you can finally "Save" these changes. At this point, the Internet light on the SmartRG should turn from red and eventually to green. PPoE config save
Wireless Setup
6. Click on the "Wireless" link on the RH side of the page. Change the SSID to the NCF standard name. Click on the "Security" subtab , store the NCF DSL password for the wi-fi password.
Modem Password Setup
7. Click on the "Management " link on the RH side of the page. Click on the "Access"?? subtab and then the "Passwords" sub.sub tab. Change the modem access password to NCF standard.
I need some more images to complete this - all in due time.
Configuring VDSL 1/5 Configuring VDSL 2/5 Configuring VDSL 3/5 Configuring VDSL 4/5 Configuring VDSL 5/5
Add WAN Service for ADSL
This section is for configuring your router to operate in dual mode, so that it will handle either VDSL or ADSL2+ connections without any reconfiguration required to go from one mode to the other. ADSL plans include the following NCF DSL Plans:
- Freedom 6/300
- Freedom 7/300
- Freedom 15-1/300
Configuring ADSL2+ 1/11
Configuring ADSL2+ 2/11
Configuring ADSL2+ 3/11
Configuring ADSL2+ 4/11
Configuring ADSL2+ 5/11
Configuring ADSL2+ 6/11
Configuring ADSL2+ 7/11
Configuring ADSL2+ 8/11
Configuring ADSL2+ 9/11
Configuring ADSL2+ 10/11
Configuring ADSL2+ 11/11
Configure as bridge
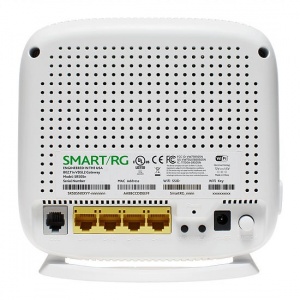
- Connect power and turn on the modem with the black button on the back.
- Connect an Ethernet LAN cable to one of the yellow rear ports
- In the browser's address bar, enter the IP address for the modem interface page: 192.168.1.1
- If the modem is fresh from the factory, use the default user name and password to gain access
- user: admin
- password: admin
If the modem was previously configured for someone, the password would be the previous user's DSL-Password. If it is unknown then do a reset to factory default, using a paper-clip in the reset hole on the back. Hold for 6 to 9 seconds to reset. The user name and password will now be as above.
- Click on Advanced Setup and WAN Service and click on Add
- The defaults are fine; click on Next.
- Click on Bridging and ensure the 802.1P and 802.1Q are set to 0 and 35, then click on Next.
- Click on Apply/Save
- Done!
See screenshots below:
Configuring for Bridge Mode 1/5
Configuring for Bridge Mode 2/5
Configuring for Bridge Mode 3/5
Configuring for Bridge Mode 4/5
Configuring for Bridge Mode 5/5
Wireless Configuration
Continuing now to set the Wireless configuration
- Ensure Enable Wireless is checked
- The SSID is set to NCF plus a random number, such as NCF_123456. It is recommended you not use your first or last name, or street address as this information is broadcast and other people in your area will be able to associate the signal with which home it is coming from.
- Click on Apply/Save at the bottom.
- Click on Security on the left.
- Set the Network Authentication to Mixed WPA2/WPA-PSK
- Uncheck Use base MAC address as WPA/WAPI passphrase
- Set the WPA/WAPI passphrase to be your DSL-Password
- Click Apply/save.
Configuring Wireless 1/2
Configuring Wireless 2/2
Password protect the Admin Role
- Click on Management on the left. Below it other options appear.
- Select Access Control
- Select Passwords
- Enter admin for the User Name
- Enter admin for the Old Password
- For the New Password use your DSL-Password or another strong password.
- Enter it once and again below to confirm
- Save the changes with Apply/Save
A pop-up log-in screen appears, and asks for sign-in. Use the User-ID admin and the DSL-Password just set. Return to the same configure page you were just at.
See also
- Dynamic DNS
- Modem Configuration (DSL) - for a complete list of instructions for all NCF modems
- Port forwarding


