
Ovislink OV978WAX


Preparation
Updated: July 2025
The OvisLink OV978WAX is a high-performance modem router supporting ADSL2+, VDSL2, and GPON/Active Fiber connections with automatic line detection and switching. Built on the Wi-Fi 6 (802.11ax) standard, it delivers enhanced spectral efficiency with throughput capabilities of up to 4.8 Gbps. Security features include WPA3 encryption to help keep your home network safe from online threats.
Before you start configuring the modem:
- Factory Settings: If you pick up a modem from the NCF office, it should already be configured for your account. These instructions are for configuring the modem from elsewhere or after it is been reset to factory settings. If the modem is not new, we recommend resetting it by holding down the reset button with a paper clip for about 10 seconds.
We recommend these settings for most NCF members. To learn more about what the settings do and more advanced settings, consult the manual.
- Ethernet Connection: Consult the About your Ovislink OV978WAX modem instruction sheet to learn how to connect the modem. We recommend configuring the modem using a computer connected by an ethernet cable, as opposed to over a wireless connection.
Configuration If you pick up a modem from the NCF office, it should already be configured for your account. You can follow our instructions to configure the modem yourself, or contact support@ncf.ca if you would like to bring your modem to our office to be configured.
Methods
If you have access to email, we can send you a file that will automatically configure your modem with your NCF account credentials and our recommended settings, this is much easier than setting it up manually. To request the file, email support@ncf.ca, and then follow our instructions to complete the configuration.
Alternatively, you can manually configure the modem by following this instructions, without the need for a config file.
Images

Ovislink OV978WAX - Front
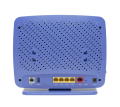
Ovislink OV978WAX - Back
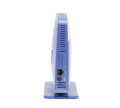
Ovislink OV978WAX - Side
See Also
- Modem Configuration - Instructions for all NCF modems