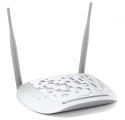
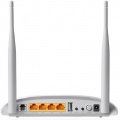
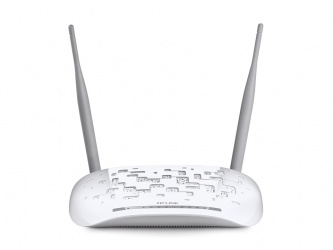
TP-Link TD-W9970 Configuration
Sold from Jan 2016 to Oct 2017
- TP-Link TD-W9970 Configuration
- Changing WiFi Channels on TP-Link TD-W9970
- About your TP-Link TD-W9970
- TP-Link - TD-W9970 home page
- TP-Link - TD-W9970 User Guide
- TP-Link - TD-W9970 Quick Installation Guide
- TP-Link - TD-W9970 Datasheet
- TP-Link - TD-W9970 Emulator
- TP-Link - TD-W9970 Firmware
- TP-Link - TD-W9970 Modem Lights
- TP-Link - TD-W9970 FAQ
The TP-Link TD-W9970 is for use on any service on networks using Bells' DSL infrastructure. To learn more about configuring your particular modem, consult the manual.
Routed
The TP-Link TD-W9970 modem router supports both ADSL and VDSL, and switches automatically to match the line it is connected to.
VDSL
Routed | VDSL | ADSL | DNS Fix | UPnP | Time | Manage Control | CWMP | Firewall ♦ Bridge | VDSL | ADSL ♦ See Also
We will start with the mode used for VDSL connections. These include the following NCF DSL Plans:
- Freedom 10-7/Unl
- Freedom 15-10/Unl
- Freedom 25/Unl
- Freedom 50/Unl
Quick Setup
NOTE: If the modem is brand new, "user name: admin" and "password: admin" will gain access.
If the modem is not new, it is recommended to reset the modem to the factory defaults by holding down the Reset/Wi-Fi button for 6 to 9 seconds and then do step 1.
1. Once you access the modem from your browser at http://192.168.1.1 and login (user name: admin and password: admin), click the Quick Setup link in the Menu on the left.
Then click Next on the Quick Setup-Start page.
Region and Time Zone
- Set Region to Canada
- Time Zone to (GMT-05:00) Eastern Time (US & Canada)
- Click Next
Auto Detection
- Click on No, I want to configure The Internet Connection myself
- Click Next
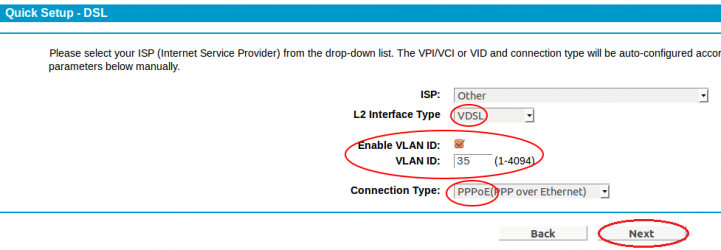
DSL
- ISP: Other
- L2 Interface Type: VDSL
- Enable VLAN ID: checked
- VLAN: 35
- Connection Type: PPPoE
- Click Next
PPPoE
- User name: ab123@ncf.ca (where ab123 is your NCF ID)
- Password: •••••••• (where •••••••• is your NCF DSL Password)
- Confirm password: ••••••••
- Click Next
3G/4G
- Click Next
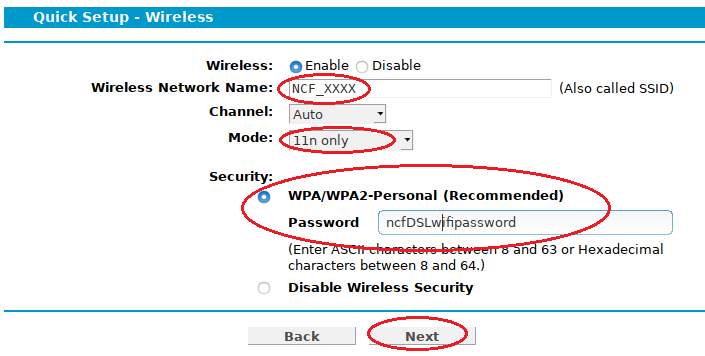
Wireless
- Wireless: Enable
- Wireless Network Name (SSID): NCF_XXXX (where XXXX are the last 4 digits of the modem serial number)
- Channel: Auto
- Mode: 11n only
- Security: WPA2
- Password: DSL Password
- Click Next
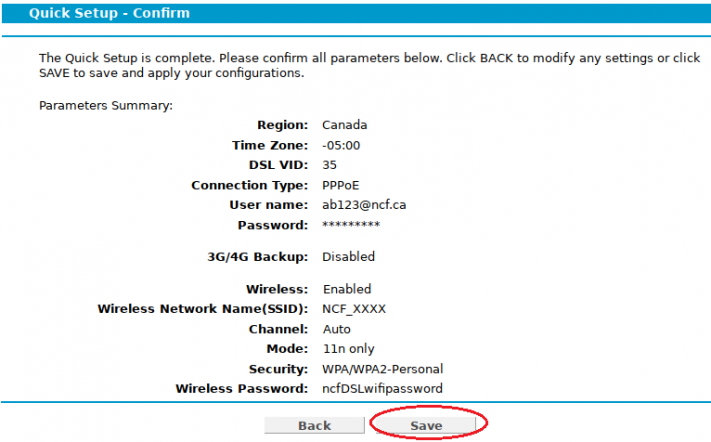
Confirm
- Verify all setting are as entered
- Click Next
Complete
- Click Finish
Stay logged-in
- Click Network (left-hand menu, 4th link from top)
- Click WAN Settings
DSL WAN Interface
- Click on Action: Edit (entry with pppoe_ptm_35_1_d, right-hand side of table)
WAN Settings
- WAN Service Setup, enter...
- Enable IPv6: Selected
- Click Advance
- Enable SPI Firewall: selected
- Enable IGMP Proxy: un-select
- Click Save
ADSL
Routed | VDSL | ADSL | DNS Fix | UPnP | Time | Manage Control | CWMP | Firewall ♦ Bridge | VDSL | ADSL ♦ See Also
Moving on now to add settings for ADSL. ADSL is required for the following NCF DSL Plans:
- Freedom 6/300
- Freedom 7/300
- Freedom 15-1/300
Stay logged-in
- Click Network (left-hand menu, 4th link from top)
- Click WAN Settings
DSL WAN Interface
- Click on Action: Delete (1st entry, right-hand side of table)
- Then click Add button
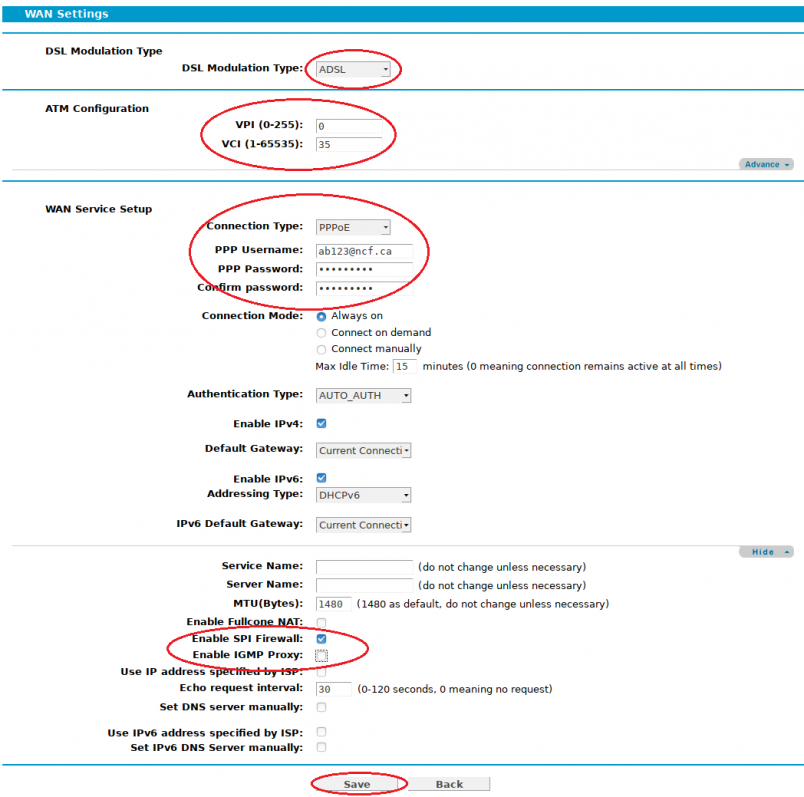
WAN Settings
- DSL Modulation Type: ADSL
- ATM Configuration: VPI/VCI = 0/35
- WAN Service Setup
- Connection Type: PPPoE
- PPP Username: ab123@ncf.ca (where ab123 is your NCF ID)
- PPP Password: •••••••• (your NCF DSL Password)
- Confirm password: ••••••••
- Enable IPv4: selected
- Enable IPv6: select
- Click Advance
- Enable SPI Firewall: selected
- Enable IGMP Proxy: un-select
- Click Save
DNS Fix
Routed | VDSL | ADSL | DNS Fix | UPnP | Time | Manage Control | CWMP | Firewall ♦ Bridge | VDSL | ADSL ♦ See Also
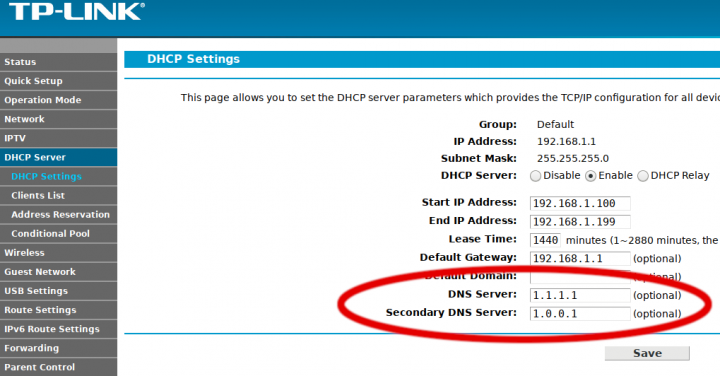
There is a known issue where the internal DNS server sometimes stop responding after swapping between ADSL and VDSL connections. To avoid this issue, we recommend hard-coding a public DNS server instead of using the internal one.
DHCP Settings
- DNS Server: 1.1.1.1
- Secondary DNS Server: 1.0.0.1
UPnP
Routed | VDSL | ADSL | DNS Fix | UPnP | Time | Manage Control | CWMP | Firewall ♦ Bridge | VDSL | ADSL ♦ See Also
- Click on Forwarding (left-hand menu, near the middle)
- UPnP: de-select
Time
Routed | VDSL | ADSL | DNS Fix | UPnP | Time | Manage Control | CWMP | Firewall ♦ Bridge | VDSL | ADSL ♦ See Also
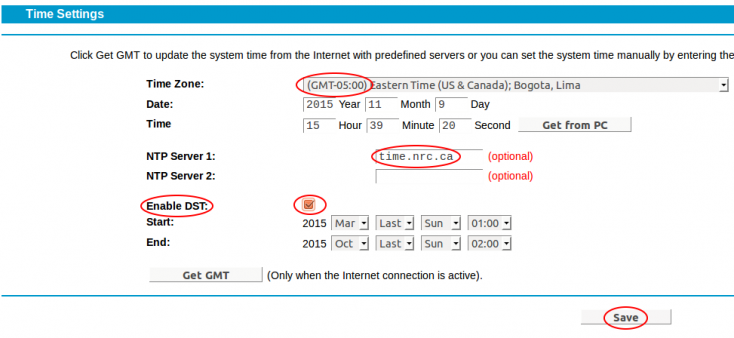
- Click on System Tools (left-hand menu, towards the bottom)
- Select Time Settings
- Time Zone: (GMT-05:00) Eastern Time (US & Canada)
- NTP Server 1: time.nrc.ca
- Enable DST: checked
- Modify DST Start: 2nd Sunday in March
- Modify DST End: 1st Sunday in November
- Click Save
Manage Control
Routed | VDSL | ADSL | DNS Fix | UPnP | Time | Manage Control | CWMP | Firewall ♦ Bridge | VDSL | ADSL ♦ See Also
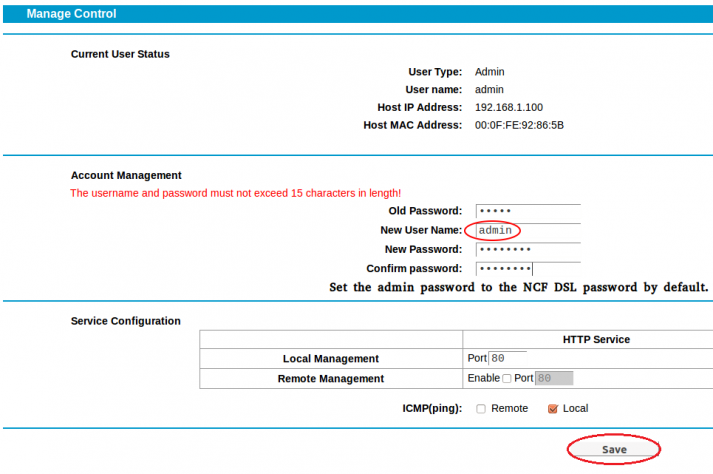
- Click on System Tools (left-hand menu, towards the bottom)
- Select Manage Control
- For the user admin we use the member's DSL Password – user name & password should not exceed 15 characters
- Enter it once and again below to confirm
- Ensure ICMP (Ping) is set to Local only (default setting)
- Click Save
CWMP
Routed | VDSL | ADSL | DNS Fix | UPnP | Time | Manage Control | CWMP | Firewall ♦ Bridge | VDSL | ADSL ♦ See Also
- Click on System Tools (left-hand menu, towards the bottom)
- Select CWMP Settings
- Ensure that CWMP is de-selected (default setting)
- Ensure that Inform is de-selected (default setting)
- Click Save
Firewall
Routed | VDSL | ADSL | DNS Fix | UPnP | Time | Manage Control | CWMP | Firewall ♦ Bridge | VDSL | ADSL ♦ See Also
- Click Firewall in the left column
- Select Enable Firewall if it's not Enabled
Bridge
Routed | VDSL | ADSL | DNS Fix | UPnP | Time | Manage Control | CWMP | Firewall ♦ Bridge | VDSL | ADSL ♦ See Also
Do this only if you prefer to use your own external router rather than the one built into your TP-Link unit.
- Connect power and turn on the modem with the button on the back.
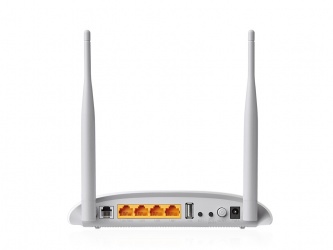
- Connect an Ethernet LAN cable to one of the yellow rear ports
- In the browser's address bar, enter the IP address for the modem interface page: 192.168.1.1
- If the modem is fresh from the factory, use the default user name and password to gain access
- user: admin
- password: admin
If the modem was previously configured for someone, the password would be the previous user's DSL password. If it is unknown then do a reset to factory default, press the reset/Wi-Fi button on the back. Hold for 6 to 9 seconds to reset. The user name and password will now be as above.
VDSL
Routed | VDSL | ADSL | DNS Fix | UPnP | Time | Manage Control | CWMP | Firewall ♦ Bridge | VDSL | ADSL ♦ See Also
- Click on Quick Setup.
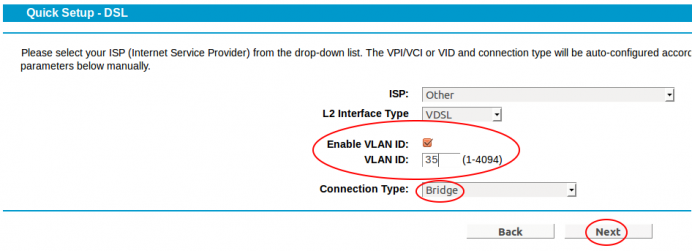
DSL
- ISP: Other
- L2 Interface Type: VDSL
- Enable VLAN ID: checked
- VLAN: 35
- Connection Type: Bridge
- Click Next
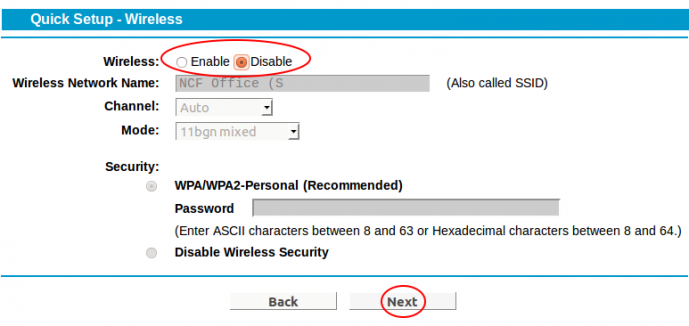
Wireless
- Wireless: Disable
- Click Next
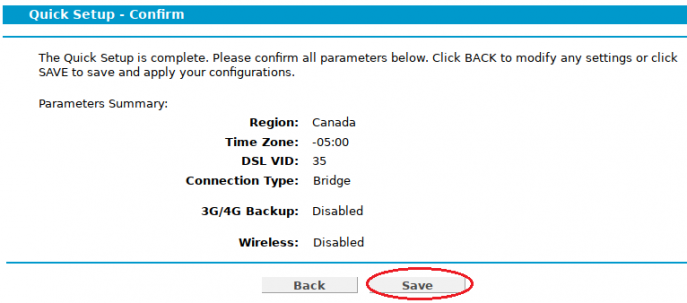
Confirm
- Verify all setting are as entered
- Click Next
Stay logged-in
- Click Network (left-hand menu, 4th link from top)
- Click WAN Settings
- On the DSL WAN Interface page click Add
ADSL
Routed | VDSL | ADSL | DNS Fix | UPnP | Time | Manage Control | CWMP | Firewall ♦ Bridge | VDSL | ADSL ♦ See Also
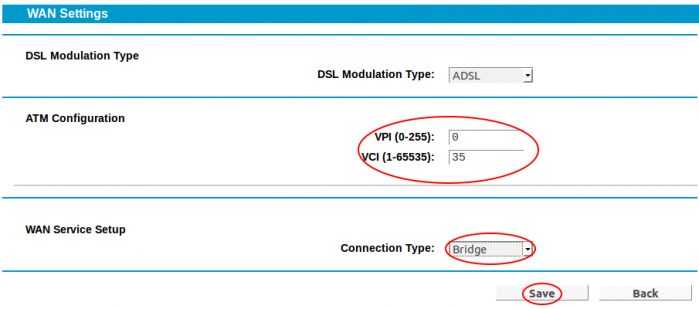
WAN Settings
- DSL Modulation Type: select ADSL
- ATM Configuration, enter...
- VPI: 0
- VCI: 35
- WAN Service Setup, enter...
- Connection Type: Bridge
- Click Save
Follow the instructions in Manage Control to secure your modem.
See Also
Routed | VDSL | ADSL | DNS Fix | UPnP | Time | Manage Control | CWMP | Firewall ♦ Bridge | VDSL | ADSL ♦ See Also
- Modem Configuration - for a complete list of instructions for all NCF modems
- About TP-Link Modem Lights
- TP-Link TD-W9970 manual
- Changing WiFi Channels on TP-Link TD-W9970
- Dynamic DNS
- Modem Manuals
- Port forwarding

