Microsoft Outlook 2007
This article details how to set up a NCF mail account on Microsoft’s Outlook 2007
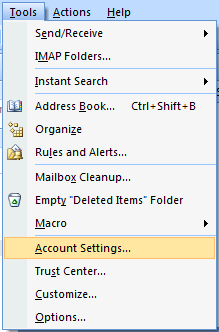
1. From Outlook 2007 open the Account Settings dialogue which can be found under the Tools menu.
2. From the window that opens select the New button located on the E-mail tab.
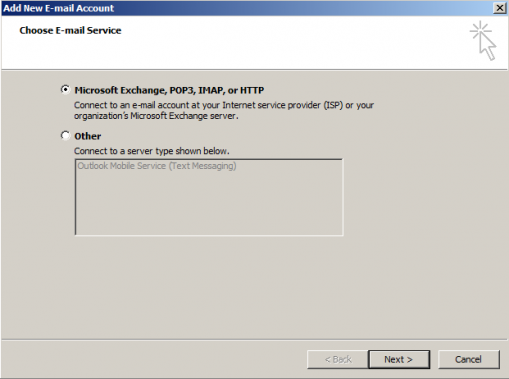
3. A new window opens where you specify the E-mail service type.
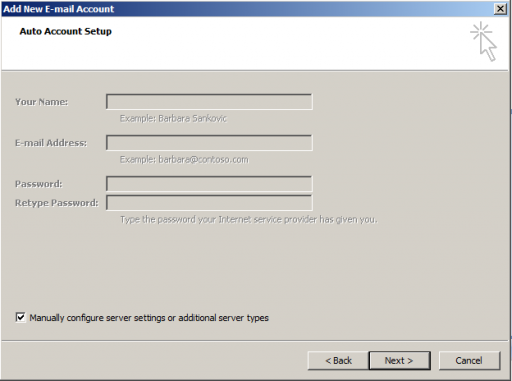
4. Pressing the Next button brings up a dialogue box where you provide your E-mail account information. Do not enter any information in the box but instead select the check box at the bottom to Manually configure server settings and then press the Next button.
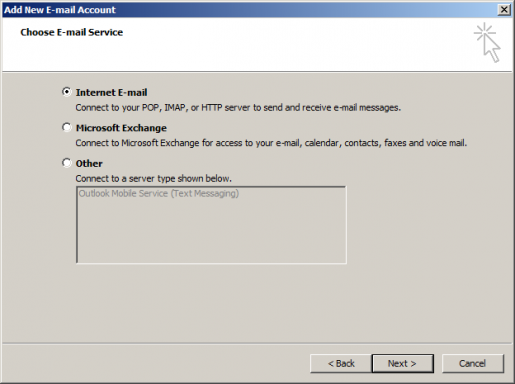
5. From the next dialogue box you specify the type of E-mail service to use.
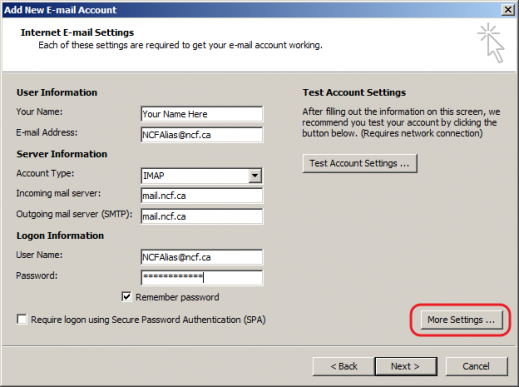
6. Finally the dialogue box where account and server details are entered is presented.
• The “Your Name” field is the description text for the “From” line attached to any email you write using this profile.
• The “E-mail Address” field can be set to your NCF ID (e.g. aa123@ncf.ca) or your NCF email alias (e.g. NCFAlias@ncf.ca). If you use your alias all emails created will not reveal your NCF ID.
• The “Account Type” field is normally set to IMAP.
• The “Incoming mail server” and “Outgoing mail server (SMTP)” fields are set as shown.
• The “User Name” field should be set identical to the “E-mail Address” field.
• The “Password” field is for your NCF password.
• In most cases the “Remember password” box is checked so Outlook doesn’t prompt you for the account password every time you search for, or send messages.
• Leave the “Require logon using Secure Password Authentication (SPA)” box unchecked.
• Rather than selecting the Next button, select the More Settings button to set additional configurations.
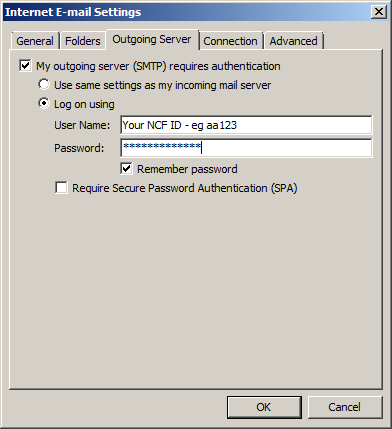
7. While the next dialogue box has multiple tabs, only two tabs are important. The first, is the Outgoing Server tab.
• It is important to check the box beside “My outgoing server (SMTP) requires authentication” as well as the radio button beside “Log on using”.
• The “User name” field should be set to your NCF ID (e.g. aa123) not your NCF email alias.
• The “Password” field is for your NCF password.
• In most cases the “Remember password” box is checked so Outlook doesn’t prompt you for the account password every time you search for, or send messages.
• Leave the “Require logon using Secure Password Authentication (SPA)” box unchecked.
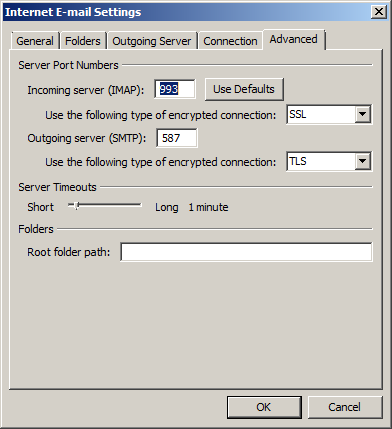
8. The second important tab of this dialogue box is the Advanced tab. The “Server Port Numbers” and encryption types should be set as shown.
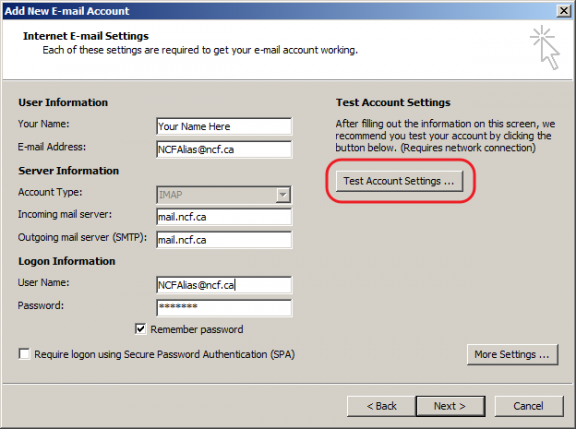
9. When the information for both tabs is set and the OK button is pressed, we return to the Add New E-mail Account dialogue box where we can have Outlook test the settings we have provided to make sure everything is set up correctly. To do so, press the Test Account Settings button.
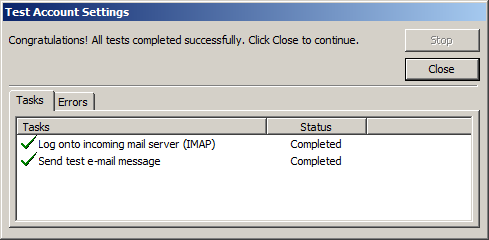
10. To perform the test, Outlook will sign in to the mail server to check for messages and then send a test message to your account. You will see a new dialogue box with the results of the testing. This box should look similar to the following.
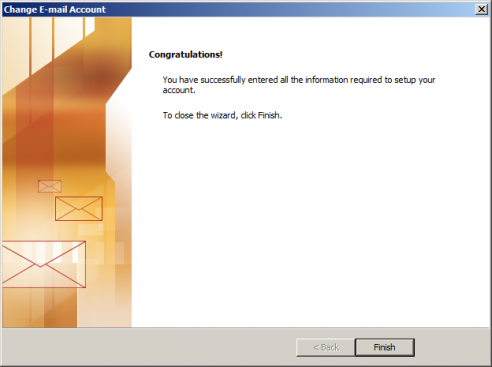
11. After closing the “Test Account Settings” window we return again to the Add New E-mail Account dialogue box where we are finally ready to press the Next button. Doing so gives a final confirmation that the account is set up and ready for use.

