Difference between revisions of "Ovislink OV501GF Bridge Configuration"
(Created page with "'''NCF Support''' is available to make configuring your Ovislink modem easier and to help you avoid potential mistakes. '''Note''': Your Ovislink OV501GF modem comes pre-co...") |
m |
||
| Line 1: | Line 1: | ||
<div class="ncfrightbox w-25"> {{Template:Ovislink OV501GF}} </div> | |||
'''NCF Support''' is available to make configuring your Ovislink modem easier and to help you avoid potential mistakes. | '''NCF Support''' is available to make configuring your Ovislink modem easier and to help you avoid potential mistakes. | ||
| Line 116: | Line 117: | ||
== See Also == | == See Also == | ||
{{Template:Back_to_the_Top}} | |||
* [[Modem Manuals|Modem Configuration]] - Instructions for all NCF modems. | * [[Modem Manuals|Modem Configuration]] - Instructions for all NCF modems. | ||
Latest revision as of 13:52, 11 May 2024
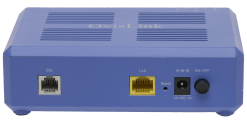
NCF Support is available to make configuring your Ovislink modem easier and to help you avoid potential mistakes.
Note: Your Ovislink OV501GF modem comes pre-configured by default in bridge mode, this means you can connect your router and log in to it to provide your NCF credentials and get internet access:
- PPPoE username: your DSL username (format: aa000@ncf.ca)
- PPPoE password: your DSL password
1. You can request a custom configuration file for your NCF DSL connection from support@ncf.ca.
- You may need an alternate means of accessing the internet to download the configuration file.
2. Call 613-721-1773 x0 to book a Modem Appointment.
If you want to confirm or modify the bridge operation settings in your Ovislink OV501GF, you might need to set a static IPv4 address manually on your computer with the gateway IP set to http://192.168.1.1 to log in to the modem, and change or confirm the next parameters.
| Steps | Menu Navigation | Parameters | |
|---|---|---|---|
| 1 | Log into Modem | http://192.168.1.1 | User Name: admin
Password: admin |
| 2 | WAN Cleanup | Advanced Setup
→ WAN Service |
Remove atm0.1/ptm01 from WAN Service Table |
| 3 | Enable ADSL | Advanced Setup
→ Layer2 Interface → ATM Interface |
Add ATM: vpi:0 vci:35
DSL Latency: FAST and INTERLEAVED DSL link type EoA |
| 4 | Enable VDSL | Advanced Setup
→ Layers2 Interface → PTM Interface |
Remove ptm0 with Path0
Add PTM: DSL Latency: FAST and INTERLEAVED |
| 5 | Configure ADSL | Advanced Setup
→ WAN Service |
Add atm0/(4_0_35) |
| 6 | Configure VDSL | Advanced Setup
→ WAN Service |
Add ptm0/(4_1_1)
|
| 7 | Admin Password | Management
→ Access Controls → Passwords |
|
| 8 | Remote Access | Management
→ TR-069 Client |
|
| 9 | System Log | Management
→ System Log → Configure System Log |
Configuration:
|
| 10 | Backup Settings | Management
→ Settings → Backup |
Settings -Backup
|
See Also
- Modem Configuration - Instructions for all NCF modems.


