Difference between revisions of "SmartRG SR506n Bridge Configuration"
m |
m |
||
| (2 intermediate revisions by one other user not shown) | |||
| Line 1: | Line 1: | ||
<div class="ncfrightbox w- | <div class="ncfrightbox w-25"> {{Template:SmartRG SR506n}} </div> | ||
{{Template:SmartRG Config Options}} | {{Template:SmartRG Config Options}} | ||
If you prefer using your own external router to the one built into your SmartRG unit, we recommend [[# | If you prefer using your own external router to the one built into your SmartRG unit, we recommend [[SmartRG SR506n Routed Configuration#with separate WiFi Router|routed operation with a separate WiFi Router]]. However if you have networking expertise and are confident using the modem in bridge mode then take note of the following before configuring your SmartRG for Bridged operation: | ||
# Once you complete configuring your SmartRG modem for Bridged operation and disconnect from the modem, the Modem's Web Interface will become inaccessible with Auto DHCP settings on your computer. We recommend: | # Once you complete configuring your SmartRG modem for Bridged operation and disconnect from the modem, the Modem's Web Interface will become inaccessible with Auto DHCP settings on your computer. We recommend: | ||
#* '''Backup Settings:''' It is particularly important to backup the '''Running Settings''' on your modem before and after you configure it. | #* '''Backup Settings:''' It is particularly important to backup the '''Running Settings''' on your modem before and after you configure it. | ||
| Line 125: | Line 125: | ||
|} | |} | ||
{{Template:Back_to_the_Top}} | {{Template:Back_to_the_Top}} | ||
=See Also= | |||
{{Template:Back_to_the_Top}} | |||
*[[Modem Configuration]] - Instructions for all NCF modems | |||
*[[Modem Lights#SmartRG|About SmartRG modem lights]] | |||
*[[:File:Changing_Wireless_Channels_on_SmartRG_SR505N.pdf|SmartRG SR505N Changing WiFi Channels]] | |||
*[[Dynamic DNS]] | |||
*[[Port forwarding#Port_forwarding_on_SmartRG_Modems|Port forwarding with the SmartRG SR505N]] | |||
[[Category:DSL]] | [[Category:DSL]] | ||
[[Category:Modems]] | [[Category:Modems]] | ||
Latest revision as of 14:53, 12 February 2019
Sold from Aug 2018 to July 2021
- Home
- Configuration from File
- Routed Configuration
- Bridge Configuration
- Firmware Check and Update
- Changing WiFi Channels on SmartRG modems
- Changing WiFi Name or Password on SmartRG modems
- Changing DNS Settings on SmartRG Modems
- Port Forwarding
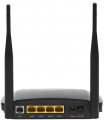
- About your SmartRG SR506n
- SmartRG - Manual
- SmartRG - Data Sheet
- Highspeed Tips - SR505n Emulator (differs slightly)
NCF Support is available to make configuring your SmartRG modem easier and to help you avoid potential mistakes. Here are simpler configuration options for your SmartRG modem:
- You can request a custom configuration file for your NCF DSL connection from support@ncf.ca.
- You may need an alternate means of accessing the internet to download the configuration file.
- Call 613-721-1773 x0 to book a Modem Appointment.
If you prefer using your own external router to the one built into your SmartRG unit, we recommend routed operation with a separate WiFi Router. However if you have networking expertise and are confident using the modem in bridge mode then take note of the following before configuring your SmartRG for Bridged operation:
- Once you complete configuring your SmartRG modem for Bridged operation and disconnect from the modem, the Modem's Web Interface will become inaccessible with Auto DHCP settings on your computer. We recommend:
- Backup Settings: It is particularly important to backup the Running Settings on your modem before and after you configure it.
- Manual IP: Setting a static IPv4 address on your computer, with the gateway IP set to http://192.168.1.1 to regain access to the modem
- Reset the modem: If you need to reset the modem, insert a paper-clip in the Reset hole on the back. Hold for 10 seconds to reset.
- If you set up the modem for Bridge operation, then your router will need to be configured in PPPoE mode with your DSL username and password.
| Steps | Menu Navigation | Parameters | |
|---|---|---|---|
| 1 | Log into Modem | http://192.168.1.1
→ Manage Gateway (Advanced) |
User Name: admin
Password: admin |
| 2 | WAN Cleanup | Advanced Setup
→ WAN Service |
Remove ppp0.1 from WAN Service Table |
| 3 | Enable ADSL | Advanced Setup
→ Layer2 Interface → ATM Interface |
Add ATM: vpi:0 vci:35
DSL Latency: FAST and INTERLEAVED |
| 4 | Enable VDSL | Advanced Setup
→ Layers2 Interface → PTM Interface |
Remove ptm0 with Path0
Add PTM: DSL Latency: FAST and INTERLEAVED |
| 6 | Configure ADSL | Advanced Setup
→ WAN Service |
Add atm0/(4_0_35) Bridge (br_4_0_35) |
| 7 | Configure VDSL | Advanced Setup
→ WAN Service |
Add ptm0/(4_1_1) Bridge(br_4_1_1.35)
|
| 9 | WiFi | Wireless | Disable Wireless |
| 11 | Admin Password | Management
→ Access Controls → Passwords |
|
| 12 | Disable Support | Management
→ Accounts → Access Controls |
Delete/Modify Account
|
| 13 | Remote Access | Management
→ Management Server |
|
| 14 | System Log | Management
→ System Log |
Configure System Log
|
| 16 | Backup Settings | Management
→ Settings → Backup |
|
See Also
- Modem Configuration - Instructions for all NCF modems
- About SmartRG modem lights
- SmartRG SR505N Changing WiFi Channels
- Dynamic DNS
- Port forwarding with the SmartRG SR505N


