
Ovislink OV935WVA


- Home
- Configuration from File
- Routed Configuration
- Bridge Configuration
- Changing WiFi Channels on Ovislink modems
- Changing WiFi Name or Password on Ovislink modems
- Changing DNS Settings on Ovislink Modems
- Port Forwarding
- Installation Guide
- Manual (differs slightly)
- Data Sheet
- Admin Emulator (differs slightly)
Preparation
The Ovislink OV935WVA modem router supports both ADSL and VDSL, and switches automatically to match the line it is connected to.
As Ovislink modems use the same admin interface as SmartRG modems, our guides for changing settings on SmartRG modems can also be used.
Before you start configuring the modem:
- Factory Settings: If you pick up a modem from the NCF office, it should already be configured for your account. These instructions are for configuring the modem from elsewhere or after it is been reset to factory settings. If the modem is not new, we recommend resetting it by holding down the reset button with a paper clip for about 10 seconds.
- Ethernet Connection: Consult the About your Ovislink OV935WVA modem instruction sheet to learn how to connect the modem. We recommend configuring the modem using a computer connected by an ethernet cable, as opposed to over a wireless connection.
Configuration
If you pick up a modem from the NCF office, it should already be configured for your account. You can follow our instructions to configure the modem yourself, or contact support@ncf.ca if you would like to bring your modem to our office to be configured.
Methods
If you have access to email, we can send you a file to automatically configure the modem with your NCF account and our recommended settings, which is much easier than going through all the steps manually. You can request a config file from support@ncf.ca then follow our instructions to configure your modem with a config file.
Alternatively, you can follow the instructions below to configure the modem without a config file.
Modes of Operation
- Routed - Functions as both a modem and WiFi router, which is recommended for most members. Another router can be added to extend the network, but each network must use a different subnet.
- Bridge - (Advanced) Functions only as a modem, so another device is required to make the PPPoE connection. Recommended for advanced members using a separate router.
Images
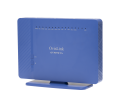
Ovislink OV935WVA - Front
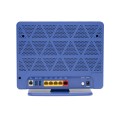
Ovislink OV935WVA - Back
See Also
- Modem Configuration - Instructions for all NCF modems
- Ovislink OV935WVA Changing WiFi Name or Password
- Ovislink OV935WVA Changing WiFi Channels
- Ovislink OV935WVA Changing DNS settings