Difference between revisions of "DLink Router Configuration"
Jump to navigation
Jump to search
m (→How to configure a DLink Router: capitalization) |
m |
||
| (11 intermediate revisions by 2 users not shown) | |||
| Line 1: | Line 1: | ||
This page outlines how to set up a DLink router to work with a DSL modem. | <div class="ncfrightbox"> {{Template:Modem Links}} | ||
</div> | |||
This page outlines how to set up a '''DLink router''' to work with a DSL modem in [[Modem Modes|Bridge Mode]]. | |||
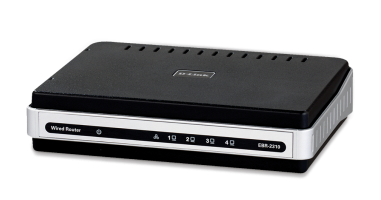
[[File:DLink EBR 2310.png|x250px|center|A typical DLink router, the model EBR 2310]] | |||
==How to configure a DLink Router== | ==How to configure a DLink Router== | ||
Look at the bottom of the DLink router to see if there is information about the configuration page address. The model used for this help page is a DLink EBR-2310, but many others have a similar interface. | Look at the bottom of the DLink router to see if there is information about the configuration page address. The model used for this help page is a DLink EBR-2310, but many others have a similar interface. | ||
#When you have logged in (the example router has a user ID of "admin" and no password), then under "Setup" at the top, and "Internet" at the left, select "Manual Internet Connection Setup." | #When you have logged in (the example router has a user ID of "admin" and no password), then under "Setup" at the top, and "Internet" at the left, select "Manual Internet Connection Setup." | ||
#On the screen | #On the next screen look for the "Internet Connection Type" and choose the "My Internet Connection is:" pull-down menu to select "PPPoE(Username/Password)" | ||
#Once you've selected that you will see the "PPPOE INTERNET CONNECTION TYPE:" box is added lower down on that page | #Once you've selected that you will see the "PPPOE INTERNET CONNECTION TYPE:" box is added lower down on that page and select the following settings: | ||
##Address Mode: "Dynamic IP" | ##Address Mode: "Dynamic IP" | ||
##User Name: Use your NCF id here, in the form of your email address - like ab123@ncf.ca | ##User Name: Use your NCF id here, in the form of your email address - like ''ab123@ncf.ca'' | ||
##Password and Verify Password - use your DSL password - which is | ##Password and Verify Password - use your DSL [[password]] - which is 12 characters long | ||
##The rest of the settings can be left as is. | ##The rest of the settings can be left as is. | ||
#When you've entered those items, select the "Save Settings" button up near the top of the screen. | #When you've entered those items, select the "Save Settings" button up near the top of the screen. | ||
[[Category:DSL]] | [[Category:DSL]] | ||
[[Category:Modems]] | |||
[[Category:Home Network]] | |||
Latest revision as of 15:03, 28 July 2018
This page outlines how to set up a DLink router to work with a DSL modem in Bridge Mode.
How to configure a DLink Router
Look at the bottom of the DLink router to see if there is information about the configuration page address. The model used for this help page is a DLink EBR-2310, but many others have a similar interface.
- When you have logged in (the example router has a user ID of "admin" and no password), then under "Setup" at the top, and "Internet" at the left, select "Manual Internet Connection Setup."
- On the next screen look for the "Internet Connection Type" and choose the "My Internet Connection is:" pull-down menu to select "PPPoE(Username/Password)"
- Once you've selected that you will see the "PPPOE INTERNET CONNECTION TYPE:" box is added lower down on that page and select the following settings:
- Address Mode: "Dynamic IP"
- User Name: Use your NCF id here, in the form of your email address - like ab123@ncf.ca
- Password and Verify Password - use your DSL password - which is 12 characters long
- The rest of the settings can be left as is.
- When you've entered those items, select the "Save Settings" button up near the top of the screen.

